In this post, I will evaluate the obstacle course animation I produced using Maya software. Overall I feel I did pretty well in making it and I am quite happy with the results, of course, there are a number of improvements that could be made to enhance the overall quality but, nevertheless I am satisfied with the work I have produced.
Starting from the beginning, the rigging process was the most challenging but the most important step as well as testing the rig whilst sorting it out. When I was rigging my character I had some difficulty with the bones but once I knew what I was doing it was working fine. At the time it seemed that my rig was perfect put later on in the process the elbows bent backwards despite bending the right way when I tested it. This came to be a problem later on when I wanted to climb the block I was not able to bend the arms in the way I wanted to. Other than that the rig worked the way I wanted to and I was able to navigate through the course efficiently.
Other than that the motion of my character through the course in its entirety requires improvement it does not have a fluidity or weight to it that closer replicates real-life movement. Another thing that requires improvement is the camera movement there are some really long shots that could be better if they were cut short and you could see the course from a different angle. The positions and timing of the cuts to different angles could be improved upon also, at points where the camera rotates its a pretty wild movement as well as the wide pan and surveillance shot. When it came to my camera direction I should have been more thoughtful and ingenuitive.
In conclusion this animation requires much improvement, but it was fun to make and I feel I accomplished much within the time restrains and my infancy in using the software.
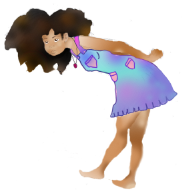
This unit involved navigating a character through an obstacle course, we had to consider movement, timing weight and observation in order to make a believable piece of animation. Our teacher designed a simple obstacle course which I then downloaded for my character. I designed a character using Maya’s 3D character Generator and then downloaded that to put into the obstacle course.
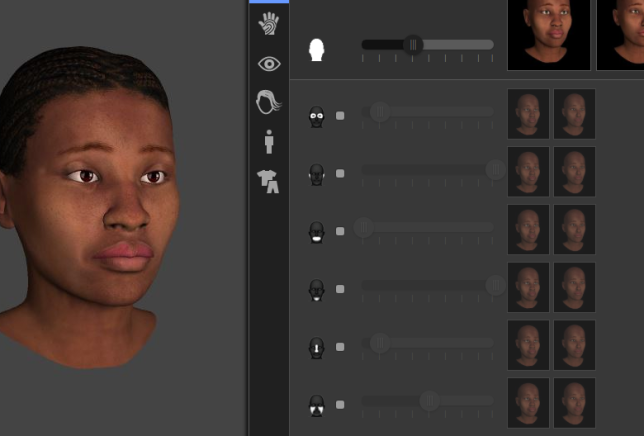
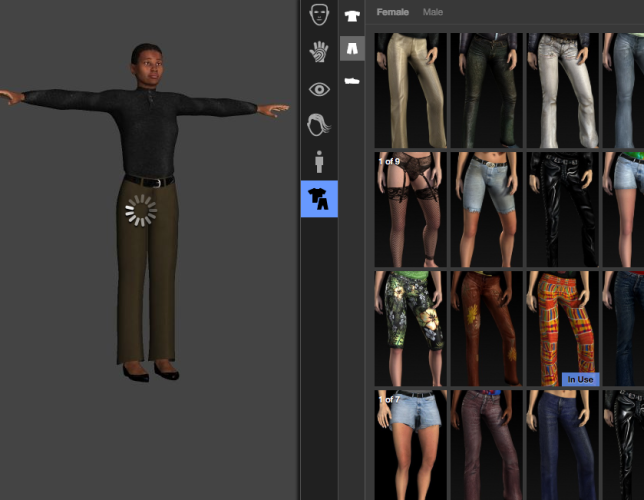
We had a range of physical features to choose from such as eye colour, height, weight, arm length amongst many other things in order to personalise our character, I chose features that would lead my character to have some sort of resemblance to me.
Once I had finished customising my character I downloaded it in a Maya binary format so that it would be compatible with the software being used to animate the obstacle course.
I was now ready to put all my assets together in one scene, both the obstacle course and the character were ready to be brought together. I imported my character into my obstacle course scene and placed her at the start position.
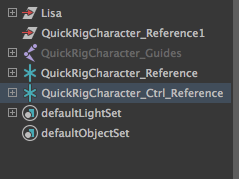
Here I began rigging my character. The rigging process is, in my opinion, the hardest part of this process as one wrong move and the limbs become incorrect. Prior to making my own character, we were given a test one and the same obstacle course to navigate through. On this version, the character had been auto-rigged which somehow lead to the legs bending backwards at the knees. After some time we realised it was the way that the joint guides were placed that lead to this error as they were to close to the edge of the polygon.
It was through this that I learnt the best way to place the joints so that the skeleton would work properly, and made sure not to repeat this mistake with the legs whilst rigging my own character. I very carefully placed the guides so that the joints would bend properly given the placement of the joints. Once I was happy with the placement I connected the joints to form a skeleton, this makes bones in the rigging process. Bones come as the space in between joints linking the whole body together. If the bones are not done properly you will not be able to have a proper skeleton which means the body will not move properly.
When you get the skeleton right you can then assign hierarchies to the joints of the body in a parent-child fashion. For example when the wrist is moved to a certain point the elbow and shoulder will also move following the wrist’s movement. This can be very useful as it mirrors actual human movement. When it is time to animate you can choose to do a single joint, which isolates the selected joint meaning that the other joints won’t follow through like ina parent’child relationship. Half body is what I used to animate as it allows for that follow affect in the movement, full body is the last option and has the most parent-child hierarchy movement that moves every single joint in the body when you move one joint, this can be inconvenient as it may move other joints too quickly for the timing of your animation. I tested the character by moving around the joints checking that they all bent properly.
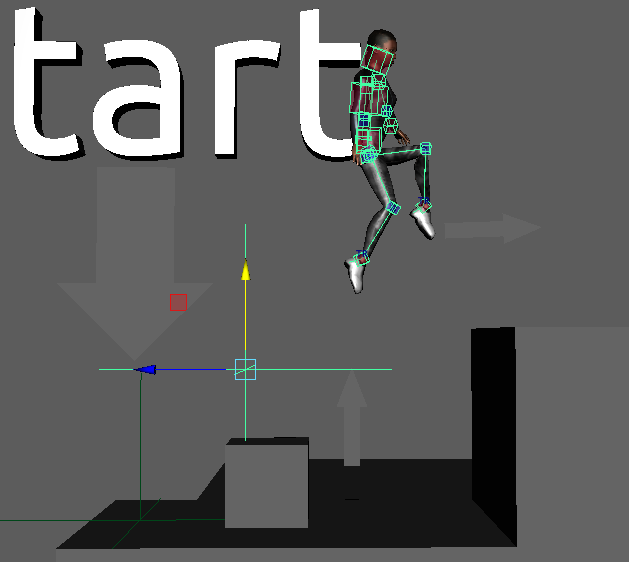
Now that I was done rigging it was time to animate, in order to make it easier to select the joins I changed then from the pre-set dots to boxes and enlarged them so I could clearly which joint was which. Using the half body feature I started with the ankles of my character and carried that motion through the entire body. I selected which properties I wanted to keyframe and pressed the s key to mark a starting position.
I then went through the course key-framing important moves that the joints experienced. I also referred to my references and blocking sheets so that I could portray the actions more realistically. One of the more challenging aspects were jumping timing and weight are very important things to be considered when jumping.
I had to constantly think about how each joint would have to move in relation to each other, rotation was the action I had to consider the most as joints rotate in order to get the limbs to move it is normally the parent join that would move up and down whilst the sequential joints would then have to rotate to complete the movement. Rotation of the full body also had to start at the hips as that area is the core of the body where we are most balanced and centered. The hips also had to be considered when doing large actions like jumping or climbing as these actions required the weight to be present at the hips and core.
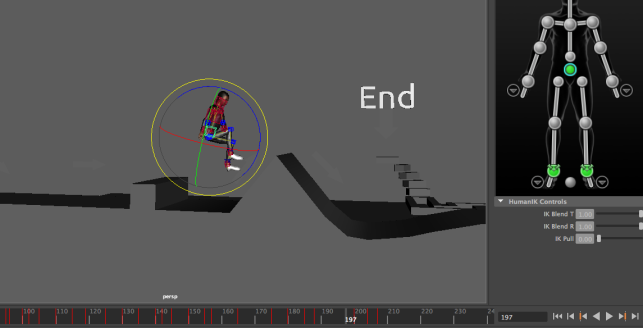
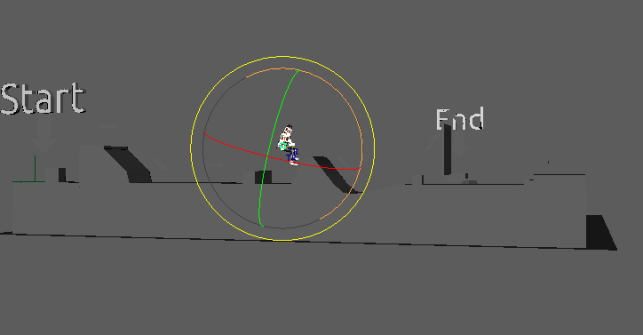
Here are some playblasts whilst I was working on the course.
For my review of a Pixar short, I picked Party Cloudly it is five minutes long and about the cloud creatures who make babies for the storks to deliver to a newly made parents. There are many bright and glowy larger clouds that make cute animals whereas the smaller darker cloud makes rougher more violent animals, that gives the stork a hard time. The storyline of the short is the dark cloud gaining confidence in his creations through his interactions with the stork, it is a very nice short.
I think one of the most important things that have to be established in a short is the characterisation of the characters this is done really well in this short as you can spot the immediate difference between the main character and the other clouds by its lack in size, shape and colour, the main cloud has a greyscale colour scheme while his peers are more pink and yellow toned, from this you can the separation between the perfect clouds and the dark cloud. They are also physically separated, the dark cloud is physically beneath the other clouds.
The climax and resolution of the story are interesting as it appears that the stork that normally visits the raincloud is tired of delivering such scary animals and decides to pick a different cloud to receive from, leaving the dark cloud upset and angry. I think that this short has a really good message for both the dark cloud and the baby animals he creates are all special and deserve homes, as like the rain cloud they contribute to the ecosystem and the chain of life.
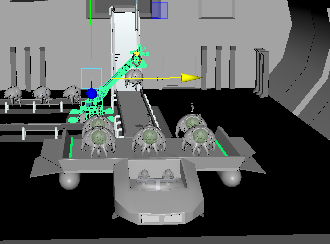
In Maya we had to animate the process of a minion being assembled after watching the tutorial on youtube, I downloaded the files from the show more section underneath the video and imported them into my Maya workspace. This was a really good way of testing my observation and timing skills which are two of the most arguably important principles of animation. The whole process had to work together and all move at the same time from the conveyor belt to the mechanic arm to the extra minion cases.
Timing is the first thing you have to get right, in the tutorial they started with the tentacle and its journey along the conveyor belt, they showed how to make it look like it was moving at a constant speed along the conveyor belt and how automatically adds Ease in/Ease Out frames to make smooth transitions in the animations movement.
By now I am very familiar with keyframe animation along a timeline and it was very simple to get the right properties animated and how to create more fluid movement. The challenge came with animating the other feature of the minion and making meet up at the right time and then making it seem that they were now connected and moving together as one at the same time.
I had to do this twice, once for the body and the other for the antenna, the antenna part was very simple as it only needed to drop from the overhead crane. The more interesting part was animating the mechanic arm as it needed to turn, bend and straighten according to how the body was being transported.
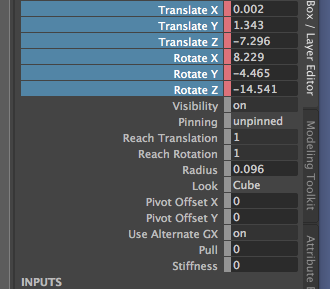
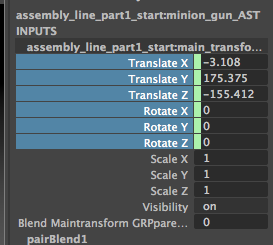
There was no way to animate the actual joints of the arm so I had to change the movement of the arm by using the input properties Arm swivature and arm translation. when I went to rotate the arm sometimes the whole machine would move and change the position of the base of the machine. There three parts to the machine the arm translation was on the same part of the base of the machine whilst the control for the arm swivel is on a completely different joint, so I had to constantly switch between the two when adding keyframes to make sure there was fluid and cohesive motion.
Once I had got the movement of the process down, complete from start to finish I started tweaking the keyframes to pace out the timing and because I did have quite a few unnecessary ones. After this, I watched it over and over to observe the timing and the speed, I changed the playback rate from ‘play every frame ‘ to ’24fps x1’ this speed up the animation.
Overall I think I did pretty well in terms of timing and pacing as well as fluidity and this was a fun project to play with.